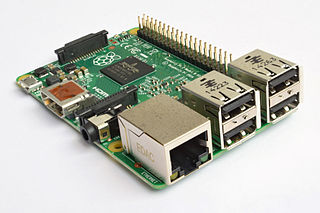
Even though there are many tutorials on how to initially set up a Raspberry Pi, I still found alot of them skipped steps or assumed too much knowledge. Since I tend to skitter between projects and come back to them months or years later, I figured I write this all down.
This is all based on a Raspberry Pi 2, but the majority of the steps should be similar for other versions; YMMV.

Originally, my Pi had come with a 2 Gig microSD card, but I found that “way to small” to work with. Additionally, I wanted to have multi different projects on the go, so I wanted an easy to way to switch between the different projects. Therefore, I bought a 32 Gig SanDisk microSD from the local CostCo store for $30 CAD.

They’ve got a good video on the Raspberry Pi website for the basic install
http://www.raspberrypi.org/help/noobs-setup/
But I’ll jot down the key things here (additionally, I had to do a number of things to properly configure for a non-UK environment).
To format the SD card, download and install the SD Card Formatter software from the SD Association:
https://www.sdcard.org/downloads/formatter_4/
Put the card in the computer, and format the card. NOTE: A number of sites suggested that the FORMAT SIZE ADJUSTMENT be set to ON. Other’s didn’t mention it. I did change the adjustment, and it seems to work fine.
I downloaded the NOOBS image from the Raspberry Pi website:
http://www.raspberrypi.org/downloads/
and then simply unzipped the contents into the root of the freshly formatted SD Card.
After installing the card into the Raspberry Pi, and attaching all the cables to the keyboard, mouse, monitor and Ethernet, as well as power, it booted to the NOOBS OS selection page.
I don’t recommend choosing the Data Partition as well as the Raspbian image. Everytime you run the NOOBS installer again, it will wipe the Data Partition. There seems to be lots of people confused about the real ‘point’ of this option. As far as I can tell, it used if you have multiple OS’s installed at the same time, and want to have a shared partition between them.
Additionally, by default, the Raspberry Pi is configured for UK usage, which includes a UK keyboard. A quick shortcut to making it work properly is to change the Language during the install process (in my case to English (US) and a us keyboard.
The install of the OS takes about 10 minutes.
After a reboot, it drops into the raspi-config screen. I usually do a couple of changes to make the environment a little more tailored for me.
- Change User Password
It’s amazing how many people leave the default password of raspberry. This creates a huge security problem. Please change the password to something more secure. - Internationalization Options
- Change Locale
I usually remove the en_GB locale, and add the en_US locale. Only having one locale selected speeds up the installation of many software, as well as reduces the amount of disk space consumed by each locale.NOTE: I always pick the UTF-8 variant, since not only does it enable good internationalization support, but also allows for much better terminal graphics support.Additionally, I set the only locale (en_US) as the default. - Change Timezone
I change the timezone to the appropriate one for me (America -> Vancouver)
- Change Locale
- Finish
Now that raspi-config is finished, I usually force a reboot. Sometimes the I18N features are not fully working until a reboot.
sudo reboot
I usually do a full update cycle to make sure that all software packages are up to date with the latest.
sudo apt-get update
Followed by an upgrade to install any updated packages
sudo apt-get upgrade
At this point, the Raspberry Pi is ready to go.


